 |
| Sanding, sanding, sanding! |
With 2012 being the wettest summer on history progress has been slow as 'rain stops play' every week, dampening our spirits and our sanding paper. We are hoping that monsoon season has finally come to an end and we can crack on.
So with the port wing finished I'm sure you would love to see some before and after shots and hear the anecdotes which have kept us going when the cries of 'are we nearly there yet' ring out.
Where do you start with an aircraft 114ft 11ins long and with a wing span of 117ft? The port wing of course! XL231's port wing is more visible to the public plus it is slightly more accessible as no other aircraft are parked on that side.
 |
| Port fuel tank rubbed down and prep'd |
 |
| Port fuel tank as good as new |
 |
| Graham getting down and dirty |
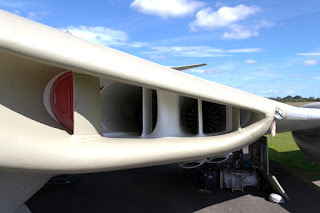
Preparing the intakes is one of the most awkward, time consuming and dirty jobs to do. Once you've made your way to the top of the steps, then to the edge of the intake 10ft above the ground, you then have to manoeuvre yourself actually into the intake - easier said than done, as you feel yourself sliding towards the engine with nothing to hold on to!
 |
| Port intake after sanding |
With a 2,406 sq ft wing area you really do have to start at the edge and work in.......
With flaps this size it really is all hands to the deck - and just when I thought I had managed to avoid the camera! Just to prove a Miele cat and dog vacuum is just as effective on Victor sanding dust!


And before you say 'You've missed a bit!', 'What you doing - painting?' or 'What colour is it going to be?' - we've heard it all before! Harking back to her pre-hemp days we keep finding green paint, even though a so called expert claimed they were bare metalled before painting in hemp!
 |
| Original green camouflage |
So after 6 years, can you spot the colour difference! With the port wing finished we have started on the starboard, then onto the tail, with the fuselage last.
 |
| Port wing finished! |
Read more at 'Never Again' part 3


